This post may contain affiliate links, which means I may receive a commission for purchases made through the links. I will only recommend products that I have personally used! Learn more on my Disclosure page!
When a major hurricane looms, standard docking procedures are simply not enough. For boat owners who must leave their vessel in the water, surviving a Category 3, 4, or 5 storm requires an advanced, robust strategy. This is where the “spider web” mooring technique comes into play. It is an expert-level approach designed to isolate the boat in its slip, using a complex array of long, strong lines to absorb and distribute the immense forces of wind and surge. This guide provides a trusted, step-by-step process for creating a mooring web that gives your boat its absolute best chance of survival.
As we detailed in our guide to general boat hurricane preparation, fortifying your mooring is a critical step. The spider web is the ultimate expression of that principle. It is a time-consuming and gear-intensive process, but one that has proven its worth in the face of nature’s worst fury.
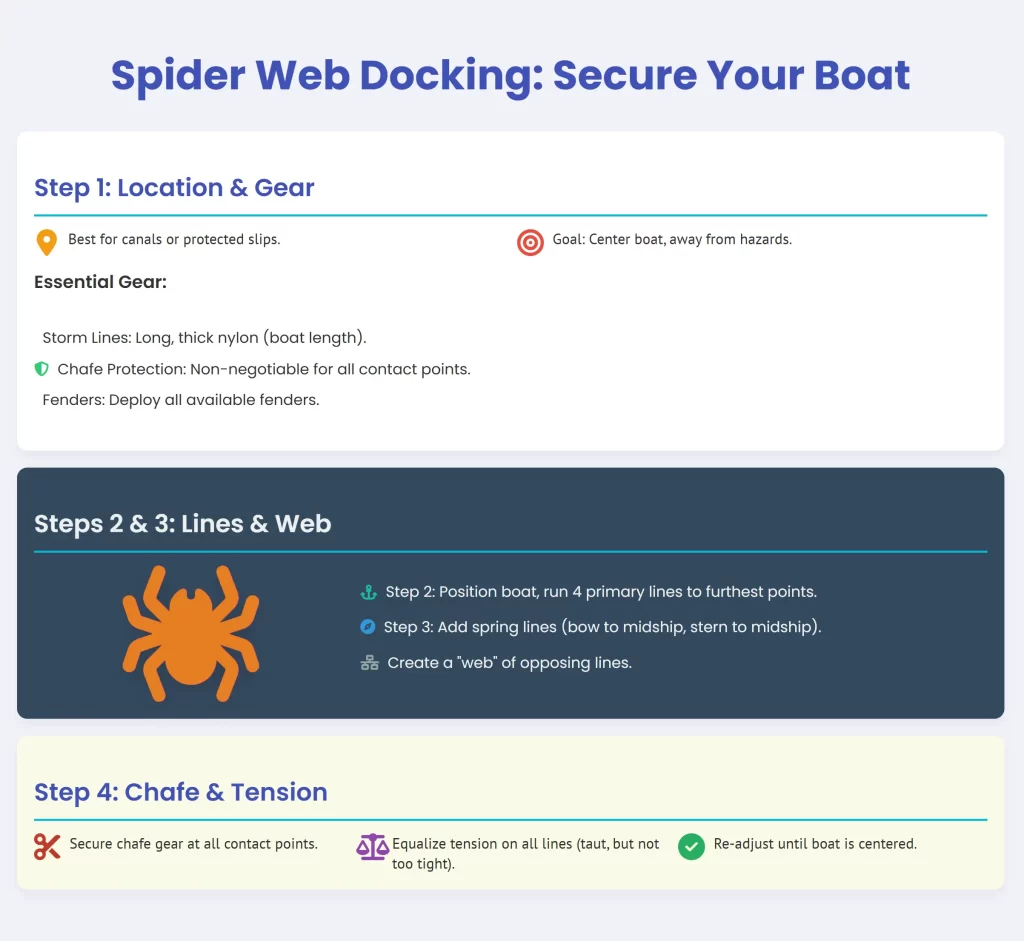
Step 1: Assess Your Location and Acquire the Right Gear
The spider web method is most effective in a canal or a well-protected slip where you have access to strong attachment points on all sides. According to BoatUS experts, the goal is to hold the boat in the middle of the slip, far from docks, pilings, and other boats.
Your standard dock lines will not suffice. You need a dedicated set of storm lines. These should be longer and thicker than your everyday lines. A good rule of thumb is to use lines that are at least the full length of your boat.3 For the material, three-strand nylon is an excellent choice because its inherent stretch helps absorb shock loads.
Essential Gear Checklist:
- Storm Lines: At least 8-12 long, thick nylon lines.
- Chafe Protection: This is non-negotiable. Every point a line passes through a chock or around a piling is a potential failure point. Use heavy-duty chafe protectors made of leather, fire hose, or thick polyester webbing.
- Fenders: Every fender you own should be deployed to cushion any potential impact.
Step 2: Position the Boat and Run the Primary Lines
Maneuver your boat into the center of the slip. The objective is to create as much distance as possible in every direction. If possible, point the bow toward the direction of the highest anticipated wind and waves.
Begin by running four primary lines: two from the bow cleats and two from the stern cleats. Instead of tying to the nearest pilings, run these lines at a shallow angle to the furthest available strong points. For example, the port bow line should go to a piling far forward on the port side, and the starboard bow line to a piling far forward on the starboard side. Do the same for the stern. These long lines are crucial for accommodating storm surge; as the water level rises, their length allows the boat to float up without creating extreme tension.
Step 3: Weave the “Web” with Spring Lines
With the four corner lines in place, you will now add spring lines to prevent the boat from surging forward and backward.
- Forward Spring Lines: Run a line from a bow cleat back to a piling amidships (midway down the boat). Do this on both port and starboard sides.
- Aft Spring Lines: Run a line from a stern cleat forward to a piling amidships. Again, do this on both sides.
At this stage, you should have at least eight lines running from the boat to various pilings. The boat should be suspended in the center of the slip, held in place by lines pulling in opposing directions. The final arrangement should, as the name suggests, look like a spider in the center of a web.
Step 4: Set Chafe Gear and Equalize Tension
Go to every point where a line makes contact with your boat’s chocks or a piling. Wrap the line securely with your chafe gear. This is the most common point of failure, as the sawing motion from a boat bucking in the waves can cut through a thick line in a matter of hours.
Once all lines are protected, begin tensioning them. The goal is to have all lines share the load equally. They should be taut, but not bar-tight. There needs to be enough give for the nylon to stretch and absorb shock. Walk around the boat, adjusting each line until the vessel sits perfectly centered and the tension feels even all around. It is a process of small, incremental adjustments.
Step 5: A Final Check
Look at the pilings. Are they wood or concrete? Experts note that wood pilings often handle twisting and lateral stress better than older concrete ones. Ensure your lines cannot slip off the top of the pilings if the surge is higher than expected. If the pilings are not tall enough, the entire effort could be for nothing.
This method requires significant planning and cooperation with your marina and neighbors, as you will likely need to use their pilings. But when a Category 5 is on the forecast, holding your boat securely in a web of well-placed lines is one of the most effective actions you can take to protect your investment.